In the following we show you how you can easily set up a firewall for your server.
Set up a firewall
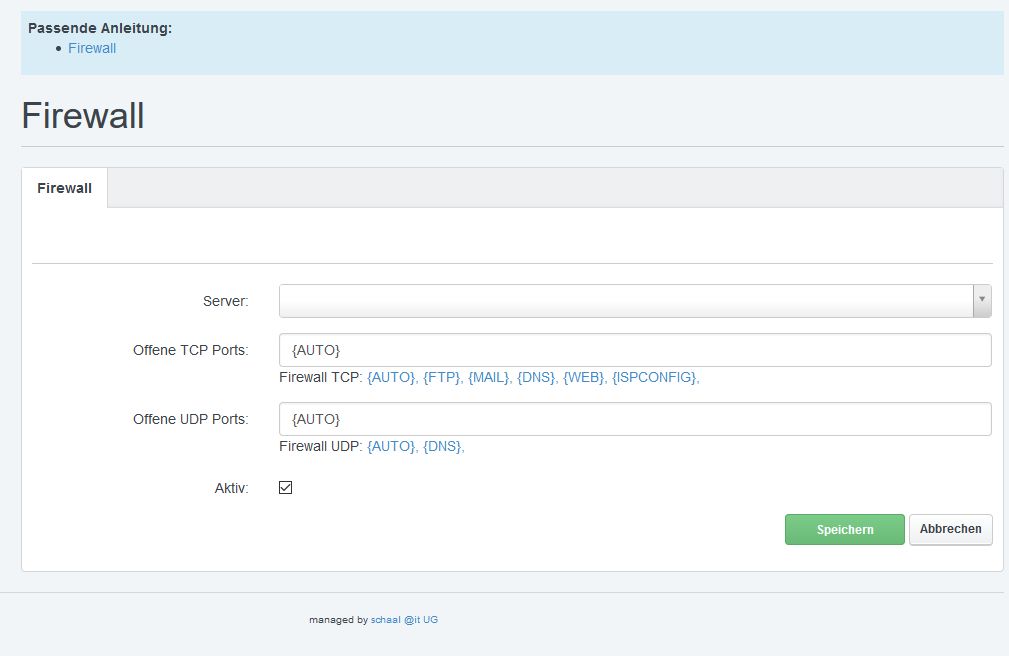
Go to the System menu and select “Firewall” on the left and then create a new entry.
Open ports
For TCP and UDP ports you can either enter the port numbers yourself or you can use one or more of the predefined placeholders. Of course you can also combine the two and add more ports besides the placeholders.
We always recommend not changing the default value {AUTO} until you are absolutely sure.
Placeholders for ports
There are several predefined placeholders that make it easy for you to release the correct and all ports that need to be accessible.
{AUTO}
If you use {AUTO}, all necessary ports required for the respective server are automatically released. For example, if you have a web-only server, the ports for mail or DNS on it do not need to be shared.
{FTP}
This is used to open the ports for FTP. This not only affects the direct port for FTP, but also the corresponding passive port range.
{MAIL}
Use this placeholder if you are running mail services on your server, e.g. if you log in with Outlook.
{DNS}
This will free the necessary port for the DNS service. This service is the only one you need to free for TCP and UDP.
{WEB}
If you have web pages on the server, you must of course allow access to the web page.
{ISPCONFIG}
If the selected server is running the ISPConfig interface you should also use this placeholder.