Here we show you how you can easily import a website and its database on our managed servers. You can also use this function if you want to move a website to a different managed server.
Requirements
- Access via FTP or SSH to the source server for importing the website
- Access via SSH, remote access to the database-server or a database-dump for database-import
- Website and database on your server (you can easily create them using the wizard and make the same specifications)
Create import
In the section “Websites” you will find the item “Import website” on the left side of your server. If you create a new import via “Import new website”, you only have to fill in the required fields in the following mask.
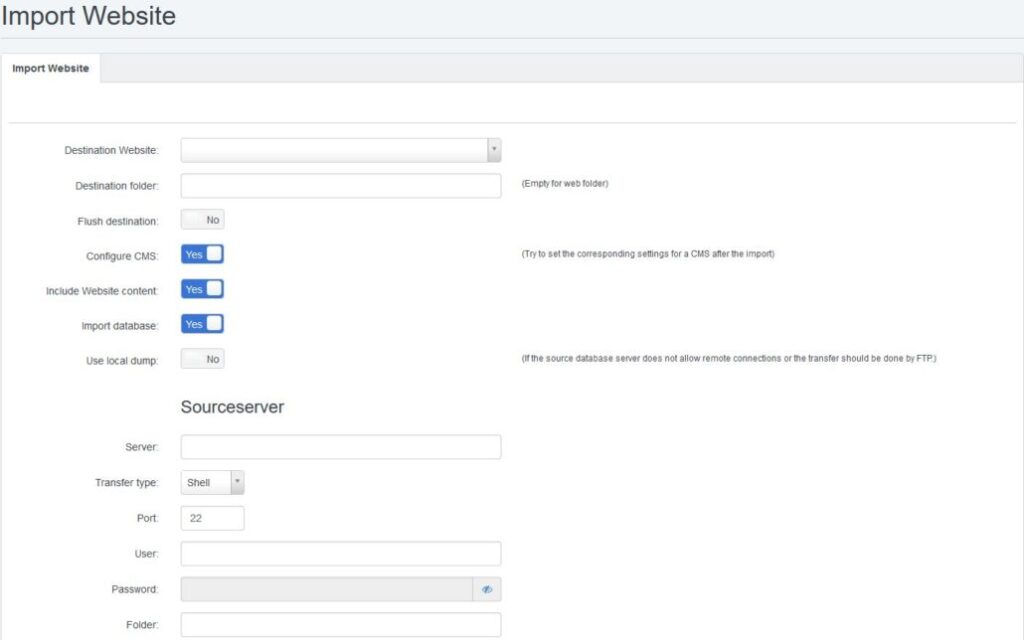

What do the individual options mean?
Most of the fields are self-explanatory, so we will only give you a few hints about individual options here.
- Configure CMS: After importing the website, we configure the CMS for the new database connection.
- Use local dump: If you activate this option, you have to upload a database dump to the /private folder of the new page and then enter the name here. This dump will – opposite to the automatically created ones – not be deleted after the import.
- Transfer type: You can choose between “FTP” and “Shell”. A connection via “Shell” is in most cases much faster; especially if you want to reimport a website.
- Port: Depending on the desired transfer method, the default port is automatically set here. If the port of the source server is different, just enter another port here.
- Folder: This is the complete (!) path to the source folder. On servers with ISPConfig, this is e.g. /web for FTP and a shell user with jailkit or the complete path to the web directory (e.g. /var/www/example.com/web) for a shell user without jailkit.
- Database server: The name of the source’s database server. If it allows external connections, you can simply enter the name of the server here.
- Temp. folder: this folder is created on the source server for creating the database dumps, as far as no remote connection to the database server is possible or you do not use a local dump. Caution: if this field remains empty, the dump will be created in the folder of the website. The name is randomly generated, but in principle it is still possible to get to this file during the transfer.
The values for the local database are read automatically and always contain a list of databases and database users that belong to the website you want to import into. You only need to enter the correct password here, as this is stored in encrypted form and therefore cannot be retrieved as plain text.
If the accessibility of the source server does not work when saving, you can deactivate this check via “Do not check for working connections”. Of course, the actual import will only work if the source server is actually reachable.
Import created
If you have created an import, you will see the respective status in the overview and in the import itself you will see the link to a log file, which you can use to view the current status at any time.
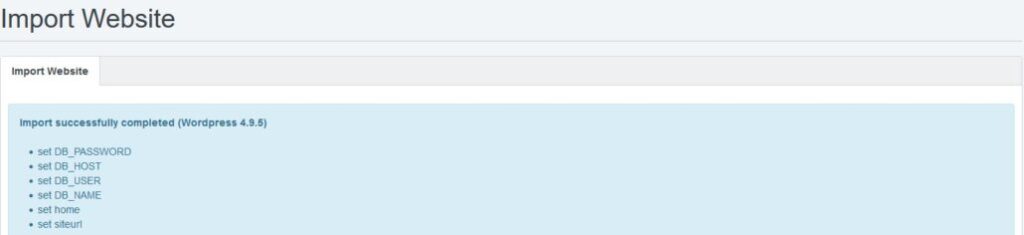
Import completed
As soon as the import is finished, you can see which CMS was imported / configured and which data was changed in the config file.
For a website with WordPress it looks like this:
Import failed
If the import of a web page was (partially) not possible, you will see the problem directly in the overview and can then fix it. Problems only occur if access data or passwords are incorrect and you have selected “Do not check accessibility”.
Import again
You can restart a created import at any time by setting the “Import again” button. You can also choose not to re-import the entire website, because changes have only occurred in the database.
Supported CMS
The following CMS are configured auotmatically after an import:
- Joomla 3.x or newer
- Nextcloud 20.x or newer
- Shopware 5
- Shopware 6
- Magento 2.4
- WordPress
Note
If you have not used the import of a website for 48 hours, it will be deleted automatically.